A website is necessary for aspiring bloggers and digital marketers in the modern digital age. Launching a website can be a powerful way to share your expertise, build a brand, or generate income. Creating a website is not an easy task. However, one of the simplest platforms to kickstart your journey is Blogger. It is a free, easy-to-use application for creating websites and blogs without technical expertise.
Blogger.com is a popular platform where anyone can easily create their website or blog, whether you’re just starting or have some experience. It was launched in 1999 by Pyra Labs and later acquired by Google, making it a go-to option for people wanting to build an online presence without getting bogged down by complicated features. The interface is straightforward, allowing even beginners without technical know-how to set up their pages quickly and effortlessly. It’s a great way to share your thoughts and ideas with the world!
Why Choose Blogger For Your Blog?
Blogger is ideal for beginners and small businesses due to its straightforward interface and integration with Google services. Here are the standout benefits:
- Free Hosting: No hosting fees, making it a budget-friendly option.
- Easy Setup: Set up and launch your site within minutes.
- Customizable Templates: Personalise your website to align with your brand.
- Google Integration: Easily connect with tools like Google Analytics and AdSense.
- Built-in Security: Robust measures to keep your site safe from spam and attacks.
However, weighing the limitations, such as fewer customisation options and scalability challenges, is important. For a simple blog or beginner-friendly site, Blogger is a solid choice.
How To Make A Blog On Blogger: A Step-by-Step Guide
This guide walks you through every step of creating a Blogger website, from setup to customisation and monetisation. By the end, you’ll have all the tools you need to build an engaging, professional, and SEO-friendly website.
1. Create a Google Account:
If you already have a Google account, you can skip this step. If you don’t already have a Google account, create one. This will act as your login for Blogger and give you access to various Google tools.
- Visit Gmail Workspace
- Select “Create an account”
- Fill in your personal information
- Verify your email address
2. Sign In to Blogger:
Now that you have your Google account ready:
- Visit Blogger.com and log in with your Google credentials.
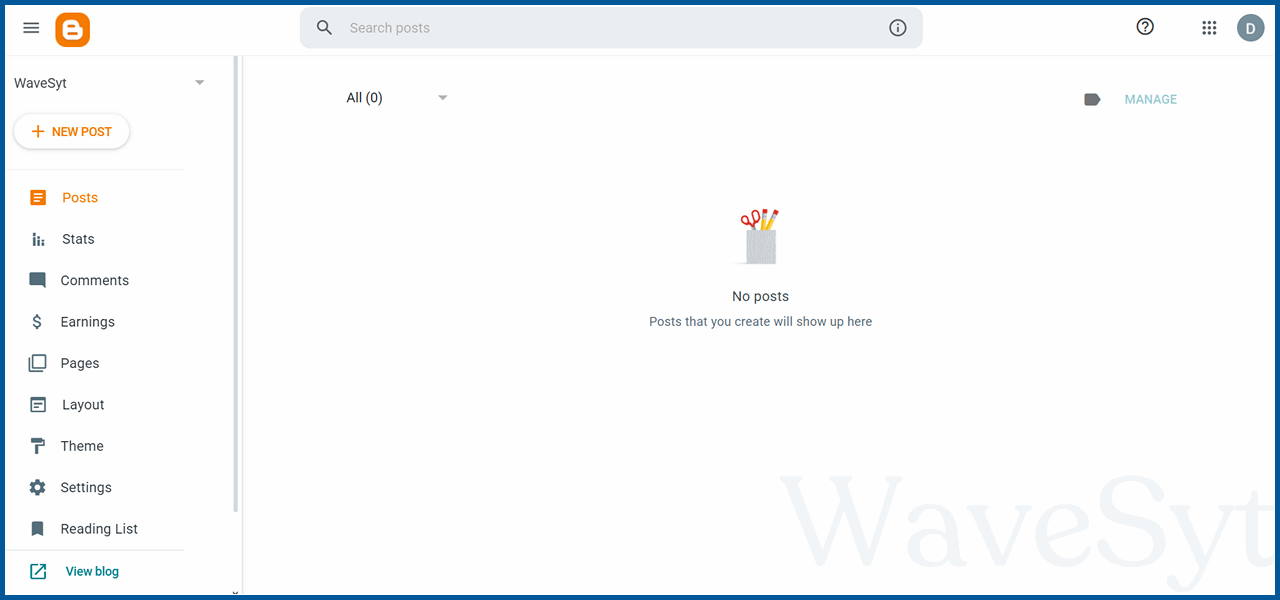
- Once inside, you’ll find a simple yet efficient dashboard to make navigation seamless.
3. Create a New Blog:
- Click on “Create New Blog”.
- Enter your blog title and choose a URL. Blogger will provide “.blogspot.com” by default, but you can later switch to a custom domain for a professional touch.
- Choose a starting template that you can edit or customise later.
4. Choosing Your Blog’s Name and Address:
This is where your creativity comes into play. Your blog’s name and address are like your online identity card – they should reflect what your blog is about while being memorable and easy to type.
Tips for choosing a great blog name:
- Keep it simple and memorable
- Make it relevant to your topic
- Avoid numbers and special characters
- Consider your long-term goals
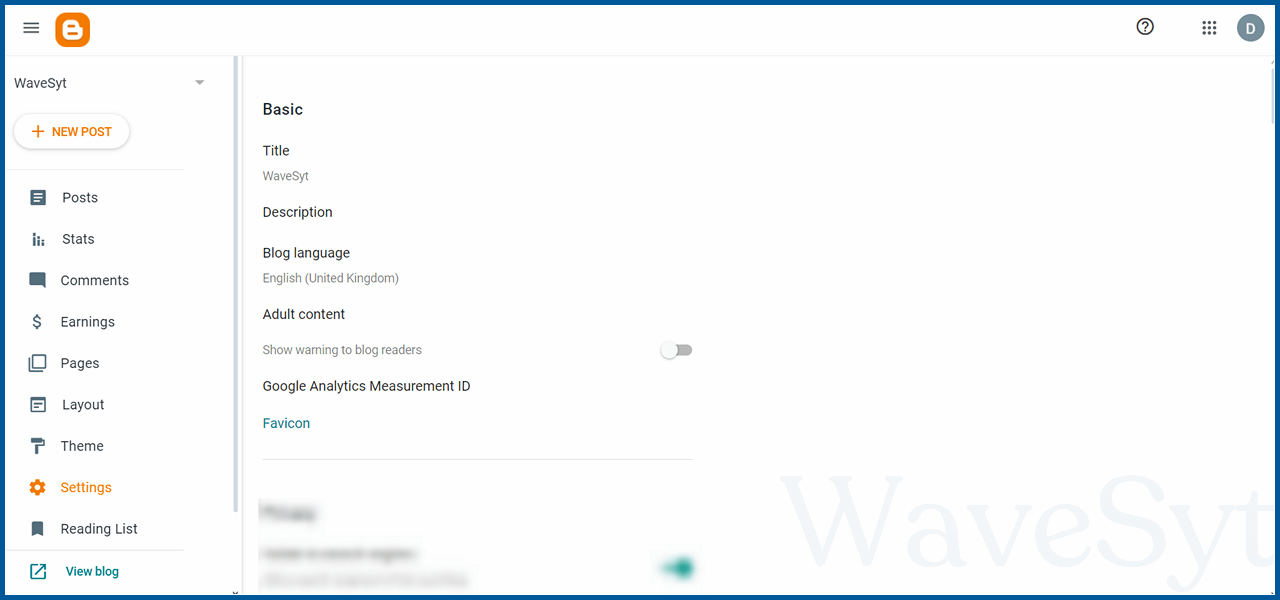
5. Modify Your Blogger Settings:
After you set up your blog name, the first thing you have to do is modify the settings.
Basic Setting:
- Enter the “Title” of your blog.
- Write a brief “Description” of your blog.
- Set your “Blog Language”.
- Mention if your blog contains “Adult Content” or not
- Add “Google Analytics ID” to track your traffic.
Privacy Setting:
- Enable the “Visible To Search Engine” option for better crawling and indexing.
- Also, enable “HTTPS redirect” to secure your blog.

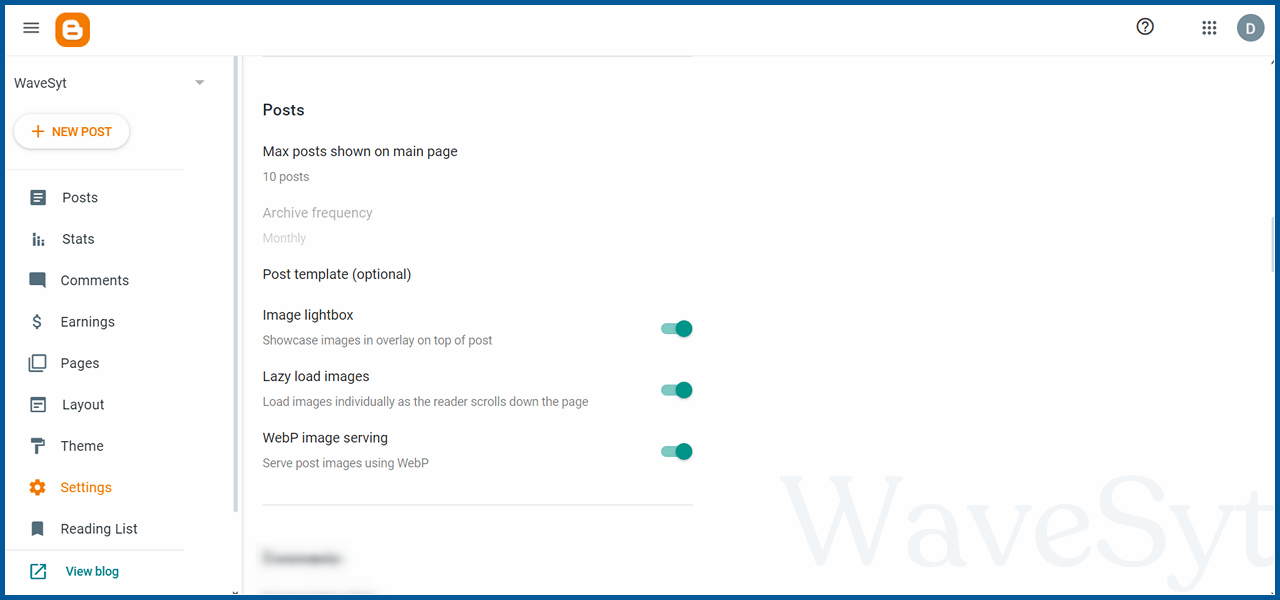
Post Setting:
- Set the number of posts you want to show on the main page.
- Enable “Image Lightbox”. It’ll show a pop-up style overlay image when clicked. It can enhance the visual experience.
- Enable the “Lazy Load Image” option. It’ll help to load images individually as the reader scrolls down the page.
- Also, enable the “WebP Image Serving” option to serve images in WebP format. It allows you to show images in a low file size while retaining the quality.
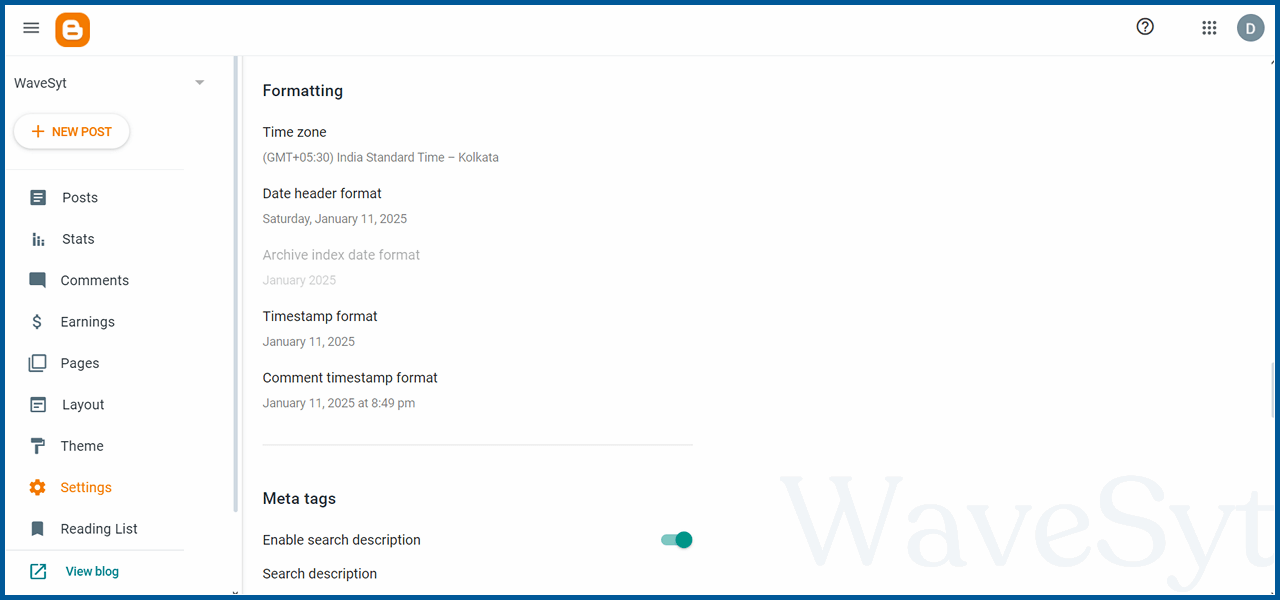
Meta Tags Setting:
- Set Date, Time Zone and Timestamp Format
- Enable the “Search Description” option and write a proper meta description. It should be within 150 characters.
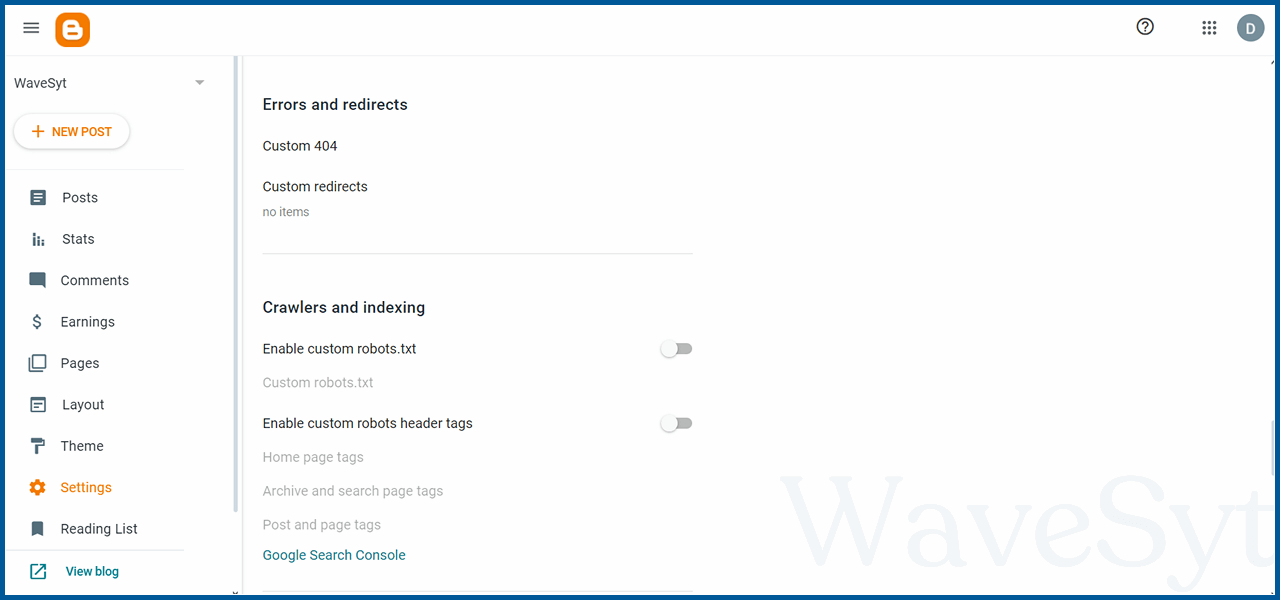
Crawlers and Indexing:
- You can add a custom 404 error page and set custom redirects.
- Enable custom robots.txt option. You can follow Google’s instructions if needed.
- Enable custom header tags.
- For the Home page, enable index and no dp.
- For Archive and Search pages, enable no index and no dp.
- For Post and Pages, enable index and no dp.
- Click on the “Google Search Console” and add your site and sitemap. You can follow Google’s instructions accordingly.
If you get enough traffic and meet eligibility criteria, create a Google AdSense account from the “Earnings” tab and submit your site for approval.
If your blog got approval from Google, then enable the “Custom ads.txt” option and enter it as provided.
6. Customise Your Blog:
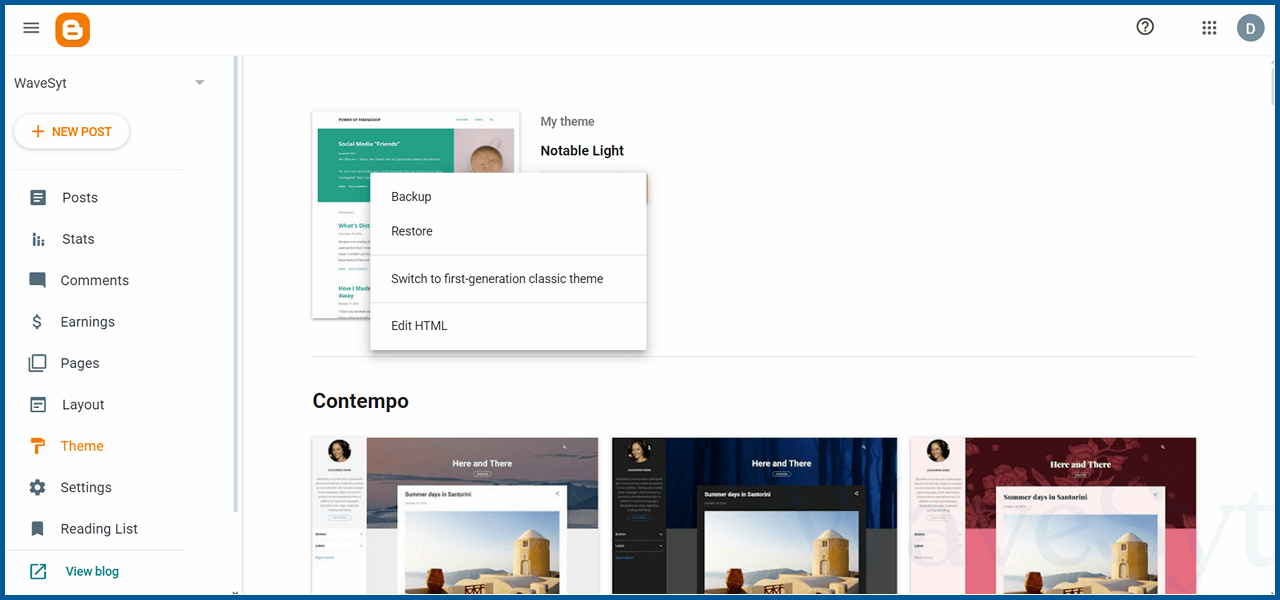
The Template: Your Blog’s Foundation
Think of your blog’s template as its blueprint. Blogger offers several free templates that you can customise to match your vision. Here’s how to choose and modify your template:
- From your Blogger dashboard, click on “Theme”
- Browse through available templates
- Click “Customize” to make adjustments
- Choose a design that fits your niche.
- Blogger offers templates ranging from minimalist to dynamic layouts.
| Element | Purpose | Best Practices |
|---|---|---|
| Header | Creates the first impression | Use clear, high-quality images |
| Layout | Organizes content | Keep it clean and easy to navigate |
| Colours | Sets the mood | Creates the first impression |
| Fonts | Affects readability | Stick to 2-3 main colours |
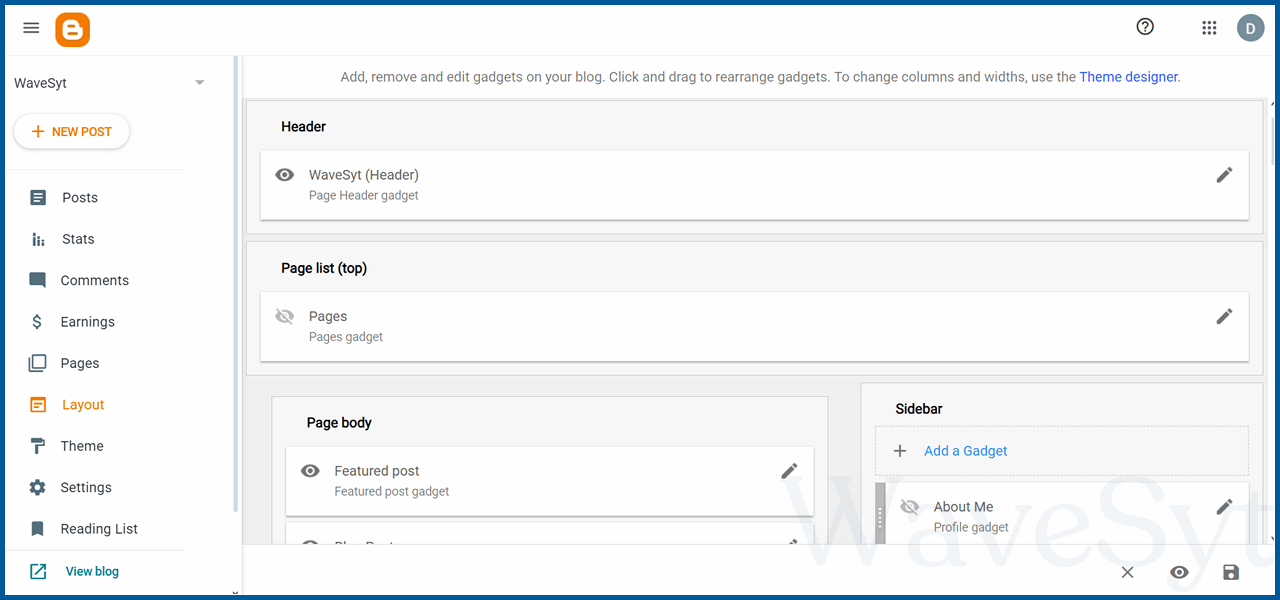
7. Layout and Widgets:
- You can modify the layout to change your blog’s look.
- Add relevant widgets or AdSense codes if needed.
8. Add Essential Pages:
Pages like “About,” “Contact,” and “Privacy Policy” enhance your blog’s professionalism. Here’s how to create them:
- Go to the dashboard and click Pages > New Page.
- Write content for the page:
- About: Share your story, mission, and expertise.
- Contact: Provide an email, form, or links to your social media profiles.
- Privacy Policy: Explain how user data is collected and used.
- Publish and link these pages in your blog’s navigation menu.
9. Create Your First Blog Post:
Content is the heart of your website. To create a new post:
- Click Posts > New Post.
- Add an attention-grabbing title.
- Structure your content with headings, bullet points, and short paragraphs.
- Include relevant keywords naturally to boost SEO.
- Add visuals such as images or infographics. Use descriptive alt text for better accessibility and SEO.
10. Add Your Custom Domain Name:
For a professional appearance, consider purchasing a custom domain (e.g., “wavesyt.com”). Link it to Blogger via the Settings tab, following the platform’s DNS configuration instructions.
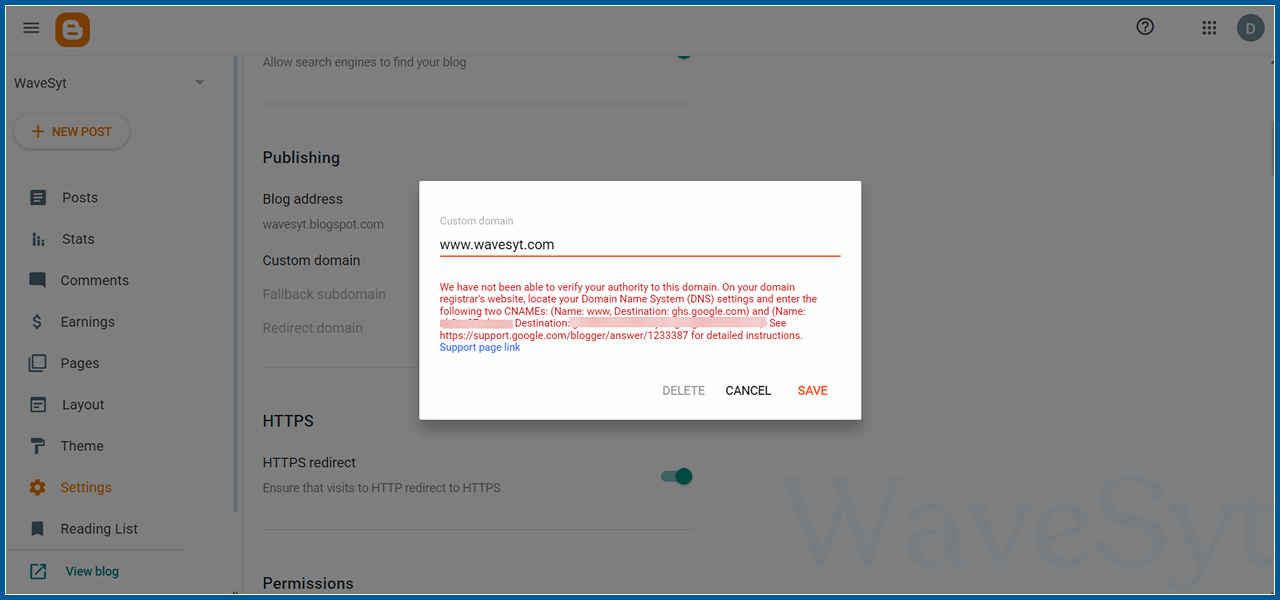
Steps to add a custom domain:
- Enter the custom domain name
- Two different CNAMEs will show
- Go to your Domain name provider’s DNS section
- Enter the Names and Destinations of the two CNAMEs
- Save them, and you are done.
11. Test and Launch Your Blog:
Preview your website to ensure all elements look great and function properly. Once satisfied, hit Publish and share your blog with the world!
Optimising Your Blogger Website for SEO:
To attract readers and rank well on search engines, follow these SEO best practices:
- Keyword Research: Use tools like Google Keyword Planner or Ubersuggest to identify relevant keywords for your niche. Try to use long-tail keywords for better specificity and lower competition.
- Meta Descriptions and Titles: Write compelling meta descriptions for each post. Use keywords naturally in post titles and descriptions.
- Optimise Images:
- Use descriptive file names (e.g., “healthy-recipes.jpg”).
- Add alt text to all images.
- Internal Linking: Link to related posts within your blog to improve navigation and SEO rankings.
- Fast Loading Speeds:
- Minimise the use of heavy images or videos.
- Choose lightweight templates for faster performance.
- Mobile Optimisation: Ensure your site looks great and functions smoothly on mobile devices. Most Blogger templates are mobile-friendly by default.
Monetising Your Blogger Website:
Once your website gains traction, explore these monetisation strategies:
- Google AdSense: Apply for AdSense to display ads on your blog. Approval depends on content quality and traffic levels.
- Affiliate Marketing: Promote products or services relevant to your niche and earn a commission for every sale made through your referral links.
- Sponsored Posts: Collaborate with brands for paid content, but always disclose sponsorships to maintain transparency.
Tips for Growing Your Blogger Website:
- Promote on Social Media: Share posts on platforms like Instagram, Facebook, and Twitter. Use hashtags and engage with your audience.
- Join Blogging Communities: Participate in forums or groups to share ideas, gain feedback, and drive traffic.
- Email Subscriptions: Encourage visitors to subscribe to your blog for updates. Use email marketing tools to nurture these relationships.
- Update Older Posts: Refresh outdated content with new information or better visuals. Search engines reward updated, valuable content.
Final Thoughts: Make Your Blogger Blog Today
Creating a website on Blogger is an excellent way to start your blogging or digital marketing journey. It’s affordable, simple, and integrates seamlessly with Google’s suite of tools. Following the steps and strategies outlined in this guide, you can build an attractive, user-friendly, and SEO-optimised blog that caters to your audience.
Remember, consistent content creation, promotion, and engagement are the keys to success. Start your Blogger website today and unlock your potential in the digital world!
Frequently Asked Questions:
Is Blogger completely free to use?
Yes, Blogger offers free hosting with a “.blogspot.com” domain. However, you can purchase a custom domain for a professional look.
Can I monetise my Blogger website?
Absolutely. You can use Google AdSense, affiliate marketing, and sponsored posts to generate income.
What are the limitations of Blogger?
Blogger has limited customisation and scalability compared to platforms like WordPress. It may not be suitable for large-scale websites.
Can I move my Blogger blog to another platform later?
Yes, you can export your content and migrate to other platforms like WordPress if needed.
Does Blogger support e-commerce features?
Blogger isn’t designed for e-commerce, but you can use third-party tools or links to external stores.
How can I improve my Blogger site’s SEO?
Focus on keyword research, optimise meta descriptions, use alt text for images, and build internal links.


